The first part to this series is an organizational solution to Kennedy’s closet. Who knew you “needed” so many baby items?! Deep down, we all know you don’t. However, when you have your first little one those that love you are happy to bless you with all of the fun, {oh, you HAVE to have this!} things that every mom desires. What to do next? Find a new home for these goods in the midst of nesting mode and your bound to realize a solution that blows anything store bought out of the park. When I began this project I knew I had three things to balance. Number one, a lack of space; number two, many baby goods that needed a new home; and number three, a storage solution that was not only attractive but also cost friendly. So what is the solution to all of this? A fabric storage bin from Target with a little flare to spice things up 😉
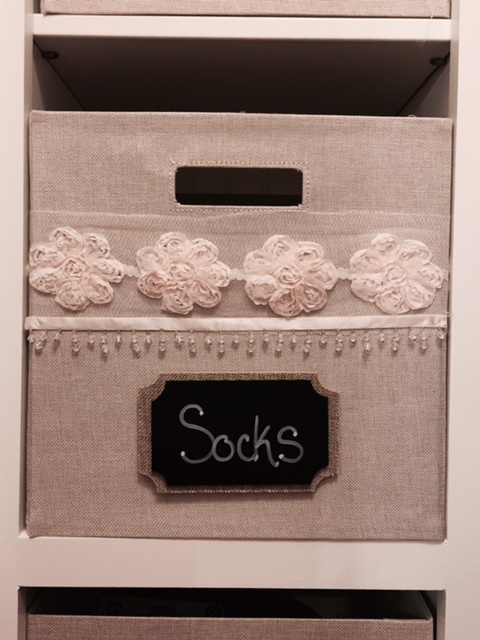
So let’s talk about how to create these on your own. You will need five things: a hot glue gun, ribbon, chalkboard for the front, a chalk marker and a tote of your choice. But, before you do anything, you’re going to want to measure your space. This is important! And, if you have a blank space, this is even better. Just make sure that your shelving is able to maximize the storage needed for the area you desire to organize. The last thing you want to do is to trick out one of these puppies and have your little one hear you frustrated because your square peg doesn’t fit in a round hole. 😉 You follow? Good! I knew I loved these fabric totes… They were simple, functional, cost effective and gave me a blank canvas to take in any direction that I chose.
The first thing I did was to lay out all of my items in front of me on the counter. Now, deep down I should share I have roots that stick with me from my grandparents living through the depression… So, I am cheap! With that being said, I only wrapped the ribbon around the front and midway on both sides. Not all the way around the bin. First step, cut your ribbon to the length you desire and glue (with the hot glue gun) one drop on each end. Don’t glue the entire ribbon down from end to end. Number one, you’re not preparing this guy to withstand gale force winds; and number two you don’t want that crinkled look from the glue drying to take away from the simplicity of the project. In this case, less is really more. Love that!
Once you get your ribbon cut and glued to your tote. Then, adhere the chalkboard to the front! It will be dry in literally seconds. Then you can go ahead a label your new signage to the bin you just beautifully created. It really couldn’t be any easier than that.
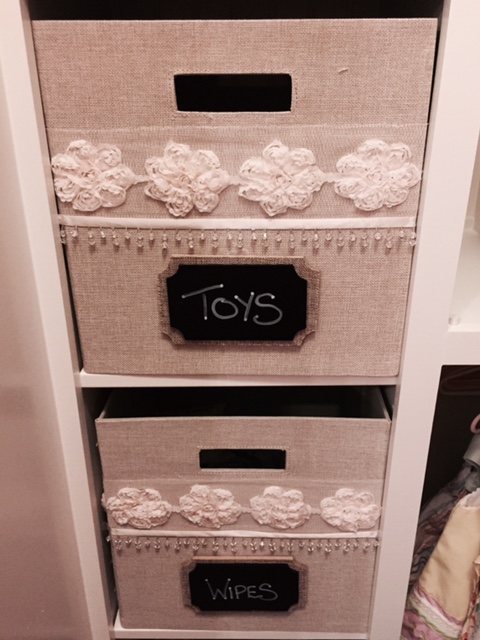
Now, a few tips: I purchased all of these items from Michael’s. So, if you’re looking for a one stop shop, this is your place. I wish I had a picture of this chalkboard piece before I attached it to this tote. Because, essentially it had a stick (picture a popsicle stick) attached to the back of this chalkboard sign. It’s use was likely intended to be placed in an herb garden or a birthday cake… But I knew it was perfect for this project. So, I just ripped that stick off because I loved the shape of the chalkboard part itself. As for the ribbon, I actually layered two. I loved the look of the opaque lacy flowers but I also wanted a material that had some substance to class it up. That’s when I found that very thin strand of jewels to adhere to the bottom of the lacy ribbon. The chalk marker? You can find that in the bridal section of Michael’s. Trust me, it was the last place I looked; but isn’t that how it always goes? Below you can see a few of the categories I chose to use in my creation. 🙂
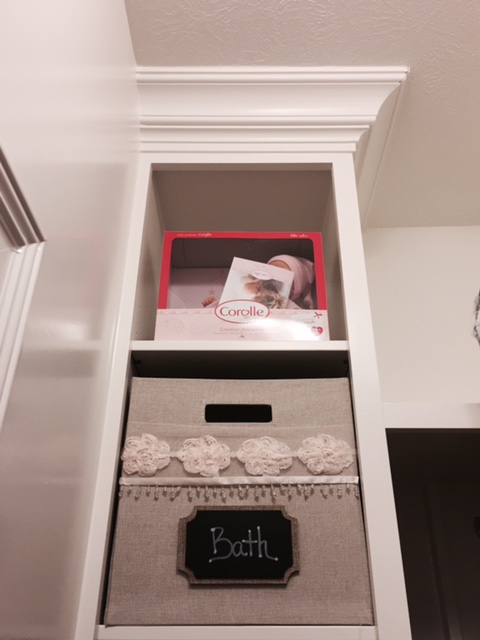
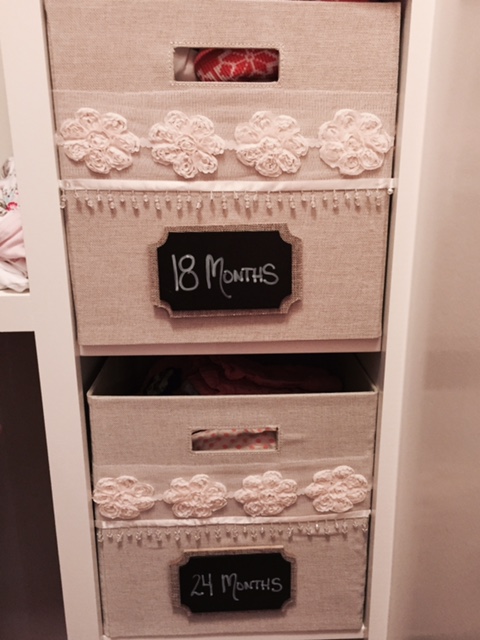


Now, not only do I have storage solutions for bath time, socks, wipes, diapers, toys, littles {outgrown clothing} 12 months, 18 months and 24 month clothing… I also have something that makes me happy when I walk into her closet. Because I know it’s personal and although they’re not perfect, they’re special. And in life it’s those things that really count in the end. May this empower and inspire you to do the same in your HOME!
XO,
Melissa
